A Guide on Setting up and Making the Best of a Router Table
Different types of router tables exist in the market with most of them availed with all accessories required for woodrouting. Once you have chosen your ideal router table, you will only get the best out of it if you understand how to set it up correctly. We shall delve into details about how to set up and use a router table. Read along to know more.
Types of Router Tables
For you to clearly understand how to set up your router table you need to understand the basics. Unlike initial models that were simple and straight forward to set up, the new router tables have been modified and redesigned such that it is a bit complex to set them up.
There are basically three types of router tables:
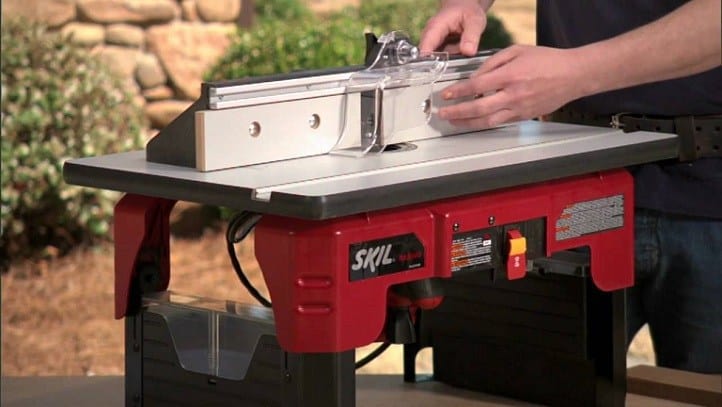
- Bench top: This type sits on a work bench and can be taken away whenever it is not in use.
- Floor-standing: This type features a cabinet that acts as the work bench and requires little space.
- Extension: This one is ideal for those who lack some space to spare. It is attached to the table saw.
It is always wise to ensure the machine is stable and since a stable base is invaluable when setting up the router table. The wheels should also lock firmly into position so that the machine does not shift while in use. You also need an adjustable fence as well as a dust collection port when using the router table.
A Guide on Setting up the Router Table
There are various factors that you need to look into when setting up the router table. The features that the router table has, in most cases, affect how accurate the cuts will be.
Consider these tips when setting up the router table:
Connecting the Switch
Make sure the switch is working properly so that you can switch the router on and off with ease. This will eliminate the hassle of being forced to reach out below and switch it off. There should also be a solid base that features in-built locking casters.
Plate and Router lift Setup
The router insert plate is another feature to look at when setting up the table. The insert plate links to the router base and therefore you should watch out for this. It should be attached in such a way that it is flush with the surface of the table. The plate should be easy to attach and remove so that height adjustments and bit changing become easier. You can also use a router lift to make this process easier.
Using Reducer rings
Most insert plates come with reducer rings which are used in eliminating any chance of chipping out. It also prevents the pieces from tripling down to the opening near the router bit. You should choose a ring that is compatible with the diameter of your router.
Set up the fence
An adjustable fence is very useful since it affects the level of accuracy that can be attained. The fence guides the work piece so that it can be worked on by the router as required. The fence also boosts the user’s safety since it facilitates an easy addition to the router table such as bit guards, feather boards, and some other accessories. In some instances, the fence has a dust collection. You, therefore, need to set up the fence for your router table.
Note: After continuous use, the router table may require some upgrade. The leather boards and the built-in-track require some adjustments. A meter gauge should also be added so that you can get additional support for precise results.
Using the Router Table When Routing Ends
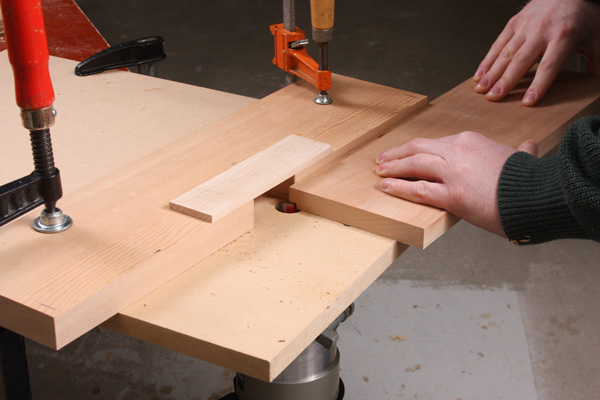
In some instances, you might be forced to “rout out” the ends of a board. This is particularly inevitable when making a joinery. In such a case your router table proves to be an invaluable machine for achieving this.
A meter gauge can be used in guiding the work piece so that it can pass through the 90 degrees angle with ease. To achieve this, the bearing on the router is aligned to the edge of the fence. This is important since it supports the work piece and protects it from any damages. If you lack a meter gauge, you can still use the router table fence and the backer board in routing the ends.
Cutting curved parts
Even though it is a challenge to” rout out” curved ends using a router table, it is not impossible. You can use a starter pin on a work piece that has curved parts. Simply ensure the irregular pieces are of the same size so that you can rough-cut them using a band saw.
Once that is done, trim them such that they match with the hardboard template. In cases whereby the curved parts require profiling such as chamfer, cove, or round over, you should ensure the bit has a bearing which you can use as a guide during the routing process. This will allow you to work on the piece of work with no need of a fence.
It is quite a breeze to work on your router table system once you understand the process of setting up and using the various components that make up a router table system.

Choosing an Ideal Router Table
For woodworker to get the best router table, they should evaluate the following:
- Flat, rigid and spacious top: This will help hold the routing machine firmly and prevent it from shifting from side to side when routing. It should also be large enough so that it accommodates the even bigger workpieces.
- The detachable base plate: This should be mounted and adjusted easily.
- Table fence: It should be adjusted easily and with minimal effort. It should also be accurate.
- Durability: It should be made with long lasting material since it is quite expensive to replace a routing table.
Conclusion
The router table can easily be setup by anyone irrespective of their skill level once they understand how to apply these basic tips. If you feel your router table is not up to the task, you can upgrade it so that it gives you the effectiveness and versatility you desire. The mentioned techniques apply to any type of router table and can help you get the best out of your router table. You can research on more techniques and tips that pro woodworkers use when operating their routers on a router table.

