
A Guide on Use of Trim Wood Technique with a Wood Router
There are various workshop tools that can be used to make excellently trimmed work pieces: hand plane, table saw, or a jointer. However, in cases where you lack a jointer or you are using large sheet materials, the wood router will be the perfect choice for the trimming. The use of the router is a popular choice in most wood working shops since it is quite simple and easy to use. In this guide on use of trim technique with a wood router details on wood router trimming is demystified.
Pros and Cons of Trimming using a Wood Router
A wood router is the best power tool for the trim wood technique since it gives good results at the end of a project. A perfectly clean work piece is attained and it is also quite easier to control the position of your final cut. The router is compact and trimming with a router is doable in even the smallest shops. Furthermore, you have plenty of options to improve your experience and the final outcome of your project.
One major setback though with using a wood router is that it may take more time if you are doing it for the first time.
Trimming Router Bits
The router bits used for trimming can make a huge difference with the final outcome of a project. The used of spiral and shear bits is ideal for wood trims since they never cause splintering or “fuzz” on the edges of the work piece. This is because the flutes of these bits are angled. They therefore cut the surface of the work piece using a slicing motion unlike other bits that chop straight into the stock.
Guiding the Router Bits
There are various options to choose from when it comes to guiding the router when routing. The wood worker can use a piloted flush trim bit or unpiloted spiral or straight bit alongside a straightedge when guiding the edge of the wood router. Alternatively, you can use a guide bushing with the unpiloted bit.
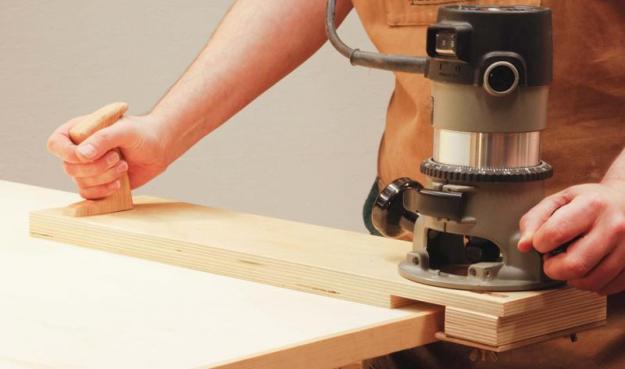
Most wood workers use the piloted bit method since it is quite easy to set up and use. While using the piloted bit, you simply align the cut line with the straightedge pattern then clamp it into place and begin the trim process. With the various shapes and sizes of piloted bits available, you can trim literally any size of material.
While using the un-piloted bit, the router has to be guided along a straight edge. Therefore, it means the distance between the router base and the edge of the bit has to be considered. This method will work just fine but it will take more time and it is easier to make an error.
Making Your own Trim
You can save a lot of money when you use your router to make your own trims. You also get excellent quality trims and you can choose from a variety of options. You can show off your woodworking expertise through the quality and variety of trims you can make. You can raise the bar of your project through the crisp edges, unique designs, smooth profiles, and excellent quality wood achieved through own trimming.
Preparation of the Stock
You can use various workshop tools when preparing your stock for milling into a trim. First off, is the table saw and second on the list are the jointer and the thickness planer. The latter are a better option since they are easier to use and give consistent results.
You can begin by jointing the stock to be trimmed flat on one face. Then create a 90° edge along the side that is nearest to other sets of passes over the jointer. Once that is done, prepare the stock to the correct width using the table saw. At this point you should create some extra strips that can be used when setting up the machine and which may be a back-up when you commit any blunders.
The thickness planer is the best tool for sizing the trim blanks since it is more accurate than sawing the strips. Plane your strips until you get the right size for the trim profile desired.
Using the Router Table
While milling trim, you can use any style of router table. However, the fence design and the shape of the table top matter. You should use a table top that is flat or slightly convex. Do not use dished tops since this will result in rising and falling of the trim strip as the router bit mills the wood.
To determine how flat the table top really is, use a jointed piece of wood or a carpenter’s square. If it requires any adjustments then adjust.
Setting up the Tabletop
In order to support each strip firmly and prevents them from sliding, you need featherboards. It helps ensure consistency when routing one trip to the other. A good fence and fencetop can be identified by their ability to support a number of featherboards.
At minimum, one featherboard is required for both the infeed and outfeed of the sides of the fence. Another two is required for the top sides of the fence. The former pair will push the trim strips a little to the tabletop and the latter will push the strips against the fence when sliding. In total you need four featherboards when working on small and medium size strips. You can add another pair of strips if your stock is large.
The featherboards should be well-positioned since this is key. To get you started, install the bit that will be used and set and lock the fence unto its final position. If possible try to mill the first few inches of one trim so that you can use it to ascertain the ideal height of the bit and fence location.
Once you are done setting up the fence, you can adjust the location of the featherboards with the trim strip set against the fence. If the featherboards are set too tight it becomes impossible to push past the bits smoothly. On the other hand, when the featherboards are set too far from the wood, the featherboard fingers with hold the trim strips loosely.
Routing the Trim
This is an important stage since you can get a substandard trim if you do not do this correctly. You should feed the wood at the right speed and with no pausing. Being consistent while doing this is very essential. Always keep your pile of unmilled strips nearby and use it to push the one being milled when there is about 12 inchesleft to rout. By so doing, you will be able to work on first and next strip seamlessly and get the best results.
Once you are done consider sanding your pieces using a sanding mop. This will give you excellent work pieces at the end of the project.
Conclusion
With this guide on use of a trim wood technique with a wood router you can be able to create excellent wood trims using your router. The process seems challenging at the beginning but once you do two or more projects it becomes so much easier.