How to make a simple Picture Frame using a Woodworking Router?
When you walk into an art store or a picture frame shop you are always intrigued by the picture frames sold. You may probably think it is complex to come up with anyone of those picture frames. But do you know you can make your own picture frame at the comfort of your home workshop? Well, it is possible. If you have the right tools in place, the desire to learn and the right materials, you are more than ready to begin.
You can add a personal touch to your photo or piece of art by simply building your own picture frame. In this article, we will demystify how to make a simple picture frame using a woodworking router. For beginning wood workers this will be an exciting experience and with many others, it would be a great way of saving a little money. It will take a few hours to get a final picture frame for as long as you have all that is required.
Step 1: Material Selection
- Router
- Table saw
- Wood glue
- Miter saw
- Hardwood. Preferably popular since it is readily available
- Sandpaper
- Measuring tape
- Hammer
- Brad nails
- Paint, linseed oil or stain.
The steps below will apply to all picture frame sizes irrespective of the type of wood you use. In this guideline, we are building an 1114 inches picture frame using a maple board of 14 inch and 4 feet long.
Step 2
With your table saw set at 1-1/2 inches from the fence to the blade, cut the wood board into 4 feet pieces. The pieces should be of exactly the same width and therefore you should pass the wider one through the table saw for a second time so as to attain equal widths. When building the picture frame, you can add your own design touches by simply rounding and shaping the pieces of stock used. The router and the router table will make this process so much easier and exciting. The round-over bit will help you in eliminating any sharp edges and give the piece of work a smooth sculpted look. It will also ensure a flawless finish making it look like one solid piece of curved wood.
Step 3
Using your router, cut a rabbet of approximately ½ x ½ inches along one of the sides of the two pieces. Your picture will lie on the rabbet and therefore if you desire to accommodate a bigger item then you have to create a rabbet that can accommodate a bigger one. The rabbeted joint is cut using a square router bit. It should be deep enough so as to ensure it holds the glass properly. This is the glass that will be in front of the picture, painting or piece of art.
Step 4
Cut a 45-degree angle on one end of the two boards using the mitre saw. Ensure you do this cautiously while ensuring that the rabbet runs along what would be the inside of the picture frame. In simple terms, once you are done with cutting the angles into the boards, the rabbeted edges should be such that they lie opposite the longer or pointier side. To make the picture frame look like one solid curved piece of wood, use a router bit to eliminate the corners where the pieces of wood are glued together. You can use a core box bit in creating a smooth round face of the picture frame.
Step 5
Take the picture you are going to frame and measure its longer side. Add 1/16 inches to what you get from the measurement then pick one of the two boards and transfer that measurement to the rabbeted side of the board. Mark the distance then cut a 45-degree angle but this time round in opposite direction to the initial angle cut.
Take the second board and place it over the one just cut to a second angle. Mark it and cut it so as to get two identical pieces. As for the two remaining pieces, do the same process of measuring, marking then cutting but this time while using the shorter side of the picture you want to frame. Just be careful while doing this so as to keep the rabbeted side on the inside of the picture frame.

Step 6
Bring together all the four cut pieces and make them into a rectangular shape, while keeping the rabbet groove on the inside of the picture frame. Dab some wood glue on the joints of the pieces and fasten the pieces together using brad nails. For an outstanding look, use two nails close to the outside corner of the pieces. Once you are done, clean any excess glue and leave the frame to dry overnight.
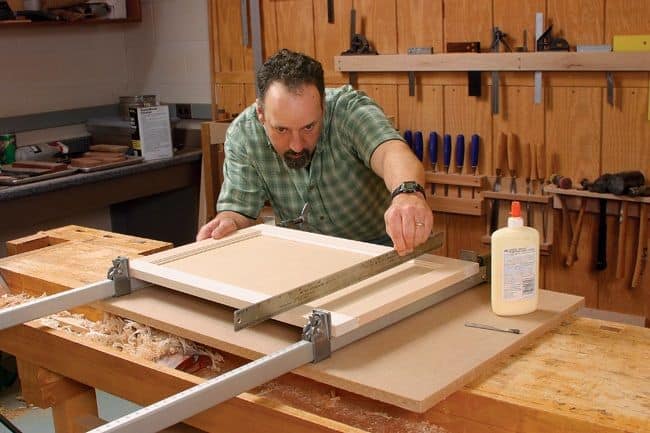
You can alternatively build a jig to glue your frame together. To do this, build a simple jig that will help you when lining your pieces correctly. Nail or screw the jig on the bench and use its corners to ensure the frame joints of your picture frame are lined correctly.
Step 7
You can now send the picture frame for a perfect finish. Use a damp cloth to wipe out any sawdust and if you had allowed enough time for the wood to dry, then you can apply your finish.
Note: If using attractive lumber to build your picture frame then it would be wise to use linseed oil as a finish.
Once done with the piece, flip it over such that the back or the rabbeted side faces up. Fit a custom-cut glass into the frame than with the picture face down on the glass, place a backing over the picture. You can use glazier’s points to hold your picture and glass in position. You can also tape craft paper over the frame’s back so as to protect your picture.
Your picture is now complete. You can now proudly place it in an open place within your room where everyone can see it.

