
How to Prepare Sets of Tongue and Groove Bits
You use tongue and groove bits for wood routers to make tongue and groove joints in woodworking projects. Examples of tongue and groove joints made using these bits include:
- Open-V and closed-V joints
- Closed and open butt joints.
- Open-notch and closed-notch joints.
In this article we shall delve into how to prepare sets of tongue and groove bits.
Practice and Repetition
It is quite a simple and easy process to prepare sets of groove and tongue bits, more so, if you practice the process several times. The main challenge lies in the joint alignment and the side of the boards you are joining. It is also a challenge to align the tongue and the groove’s upper and lower shoulder. It is normally wise to ensure that there is equal thickness between the shoulder just above and below the groove and the tongue. However, this will depend largely on how thick the work material is. It is wise to use ¾ inch thick wood because it works perfectly with this type of cutters. It will also be utilised to the maximum when used with these bit sets.
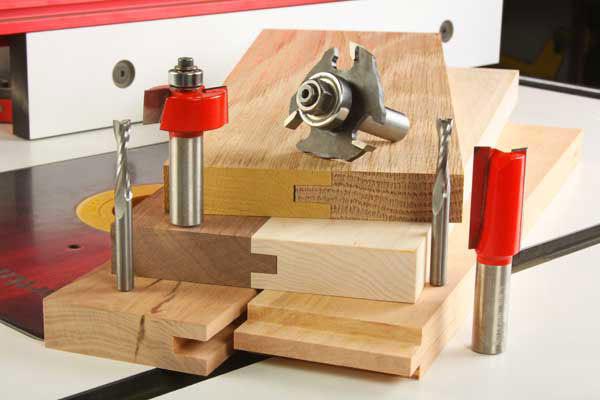
Note: In this article all examples will use wood with ¾ inch thickness and the type of tongue and groove bits used is Infinity #61-502 with ½ inch shank. This has been chosen because it has a design comparable with some other sets of tongue and groove bits available in the market. Therefore, this setup process will apply to most of them. Always follow the instructions that come with your bit set in case it is not in line with this procedure.
How to Prepare the Fence?
The two Infinity bits come with depth-limiting bearings pre-installed. With the use of a straight edge, use bearings on both bits to setup the fence flush’s face. This will automatically control the groove’s depth as well as the tongue length so that when installed they fit perfectly.
Use a scrap with an equal thickness of the project material. It should be large enough for safe groove-cutting. Use a tiny combination square set to under ¼ inch in drawing some lines on the scrap edges on both sides of its end. This will create a “bracket” that will act as a guide that will help centre the bit on the piece of work during the first time. Place the workpiece on the router table and make bit height adjustments on your router such that the cutter lies at the centre or between the two lines.
Once you are contented with what you have set, prepare the fence then cut one of the scraps’ edges. Switch off the router, turn the board over and position it against the cutter once more. If you notice that the cutting edge easily slides into the groove with the board inverted, it means the groove is well-centered and the bit height has been set perfectly.
In case the groove fails to slip over the bit, investigate why it is colliding with the sample. In case the cutter’s upper edge hits on the shoulder (the board still inverted), your bit was set too high. You should lower the bit by an amount equal to 1/2 of the amount of error seen. For instance, if the error is approximately ¼ above the groove, you bring down the bit by 1/8 inch to correct the error. Once done with the rectification, repeat the same procedure on the uncut edge of the scrap and check to confirm the setting.
When done and satisfied with your setup, cut a sample piece that can act as a guide in the near future when you use this bit.
Tongue Cutter Set Up
When you purchase Infinity bits for tongue cutting, you get a stack of washers with 0.0295-inch thickness. They are used in setting the twin cutting blades spacing. This helps in regulating tongue thickness. Always ensure the bronze-colored washer that lies between the top cutter and the bearing lies against the bearing every time when in use. All other spacing washers set below the upper cutter should remain above the bronze-colored washer.
Firstly, attach tongue bit cutter into your router table while ensuring the nut is snugged down and the cutters installed. Place the groove gauge block prepared earlier on the router bench or table, close to the bit, then make bit height adjustments to ensure that the edge above the lower tongue is completely in level with the groove’s lower edge. Check to confirm whether the groove’s upper edge is even with the top cutter. If not level, identify the deviation from the correct position and do the necessary adjustments so as to raise it by that amount.
Secure well the nut into the tongue cutter’s top then align it once again with the groove gauge block or guide to make sure they are aligned correctly. If you are visually satisfied with the alignment, use a piece of scrap to cut a tongue that is of equal thickness as the wood used in the project.
Try to fit the groove gauge with the tongue and try to adjust the spacing washer to ensure the groove can fit perfectly. The tongue and the groove should fit easily without the need to apply much force. This is ideal for creating room for contraction/expansion as well as for the glue.

If you realise that the groove fits perfectly with the tongue but the faces are not well-aligned, make the necessary adjustments to the bit height so as to compensate for that. If content with the fit and the face alignment, take another scrap piece then make a cut that will act as a guide to be used in future when setting the tongue cutter bit.
You are now done with preparing your sets of tongue and groove bits. After doing this several times, the procedure becomes much easier and faster to do.
Summary
It usually sounds tricky on paper to follow the process of preparing sets of tongue and groove bits but it is not as challenging as you may think. Every woodworker is advised to practice the cuts using some scrap pieces prior to embarking on a job that matters. The more you practice, the more experience and skill you gain. With regular practice, you will be able to come up with great pieces of work. You can make your joint-cutting experience fun and excite by practising with scrap pieces regularly.