
How to Make Dovetail Joinery with a Wood Router
Your router can be one of the greatest assets to have in your workshop. It performs virtually anything and everything. It has become a favourite tool for most woodworkers, professionals and amateurs alike. Joints are mainly used in linking together pieces of wood so as to strengthen the piece of work. For instance, when building cabinets or drawers. The dovetail joint is a type of joint where one of the ends that have tails is joined to another end that has pins. This type of joint is common among woodworkers and you can learn how to make dovetail joinery with a router by following some easy-to-follow steps. Read along to find out how.
Requirements
- Clamps
- Wood block
- Wood router
- Scrap wood
- Spacer fence (3/8 or ½ inches)
- Router bits (3/8 or ½ inches)
Steps to follow
- Check out to ensure that the power cord of the router is disconnected from the electrical outlet.
- Attach the router bits into the chuck on the table mounted router.
- Put the spacer fence (1/2 or 3/8 inches) on the router table, above the router bit. Ensure the size of the bit chosen is compatible with the size of the spacer fence. Use the clamp to hold the spacer fence into position.
- Make some adjustments to the router bit depth so as to ensure it is a little bit greater than the thickness of the piece of wood to be routed.
- Position the wood block correctly on your router table, just behind the router bit. Make sure the wood is positioned such that the router cuts against the block and the edge set should face the table directly. Switch on the router and cut your first pieces in the wood.
- Hold up the piece of wood and put your first cut above the spacer fence guide. “Rout out” another piece of the wood and repeat the same process until you are done with cutting the wood.
- Using another piece of wood, cut dovetail joints while ensuring that same spacing is maintained similar to the ones on the first piece.
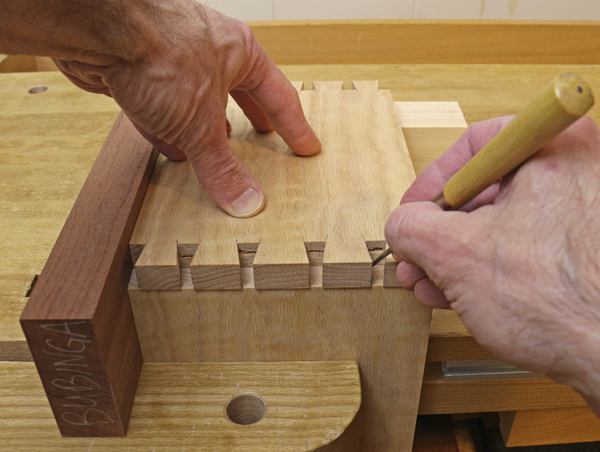
- Link together the cut ends of the wood such that they can interlock. If they cannot interlock perfectly make necessary corrections until they fit perfectly.

Time to Glue Together the Dovetail Joint
Now that you are done with making the dovetail joint, you have to glue the joint together. Here are some steps to follow:
Requirements
- Clamps
- Glue brush
- Glue
- Pieces of wood for clamping
- Damp rags
Instructions
- Make the clamping blocks: The process of clamping a dovetail joint requires that you apply pressure on the tail faces. If you fail to do so, you might end up wasting that pressure on the ends of the pins only irrespective of how tight the clamp might be. In order to clamp a dovetail joint properly, the woodworker should use a scrap wood that is slightly longer than the width of the joint, and slightly wider when compared to the width of the joint. You then cut notches in it such that they correspond with the position of the pins. Once you are done with this, hold it over the joint and it should lie only on the tail faces.
- Dry fitting: This is the process of testing whether the dovetail joint fits effortlessly or not. Dry fit the joint and check out for any cracks in the piece of wood that may result due to extremely tight fitting between the pins and the tails of the joint. If not fitting properly, remove the joints and use a chisel to fine tune the joint. When everything is in order, reassemble the joint(s) then check again while using clamps and clamping blocks to hold it in position. Ensure you have used the sufficient number of clamps per joint until all gaps and cracks are completely closed.
- Place some glue on a flat surface and take your glue brush. Mark your pieces properly before disassembling especially for small dovetail joints. In case you are working on large dovetail joints, there is no need to disassemble everything. Simply pull the dovetail joints apart at least halfway.
- Application of the Glue: Take the glue brush and apply some glue on the inner side of the tail faces, inner ends of the pins, the tails sides, and the pin sides where they will link with the tails. In case of large joints, apply sufficient amount of glue on the joints as possible. Use damp rags to wipe out any excess glue.
- Dovetail joint reassembly and clamping-bring together the dovetail joint or joints then use clamps or clamping blocks to clamp them together. For joints that do not fit perfectly, use a mallet to drive the joint into position before clamping. When doing this, the glue will squeeze out and this is an indication that you used enough glue. If it does not squeeze out, it means you did not use enough glue.
- Finishing: For a clean finish, wipe out excess glue and if there is a little of it, wait for at least 5 to 10 minutes to allow the glue to settle on the surface. You can then use a chisel to remove the glue from the wood. This will help reduce the amount of glue that soaks up on the wood and this is ideal when finishing the surface of the piece of work. In case the glue remains stuck on the surface, you must get it off. Use a damp rag to do this.
Conclusion
The process of making dovetail joinery using a router is quite easy. Once you master the basic router techniques, you can do anything with a router. It is with this regard that the router is referred to as the most versatile woodworking tool. Most woodworkers find it challenging to work with a router when they begin learning the routing process. However, with time and practice, they find out that they can now do what was initially daunting to handle.