
A Guide on Making Homemade Base Plates for Router
The wood router is an incredibly versatile tool and you can increase this power tool’s versatility by including a router plate in your router table. The router plate gives you better mounting options and will facilitate better accuracy and excellent cuts. You can make various base plates at your home workshop by following some simple procedures outlined in this guide on making homemade base plates for the router.
Some of the base plates you can make at home include: large-hole base plate, circle jig base plate, and a router table base plate. It will take approximately 30 minutes to complete each of these base plates.
Why make a Homemade Router Base Plate
There is nothing as annoying as when you have just bought a new bit and with all the excitement to use it, find out it does not fit with the factory base plate. This happens more often and the solution is not to get a new router bit. You should simply make a new base plate for the wood router, a plate that is compatible with your new bit.
By making your base plate at home you avoid the need to spend money on a new bit and divert this money to other useful purposes.
Procedure of Making the Base Plate
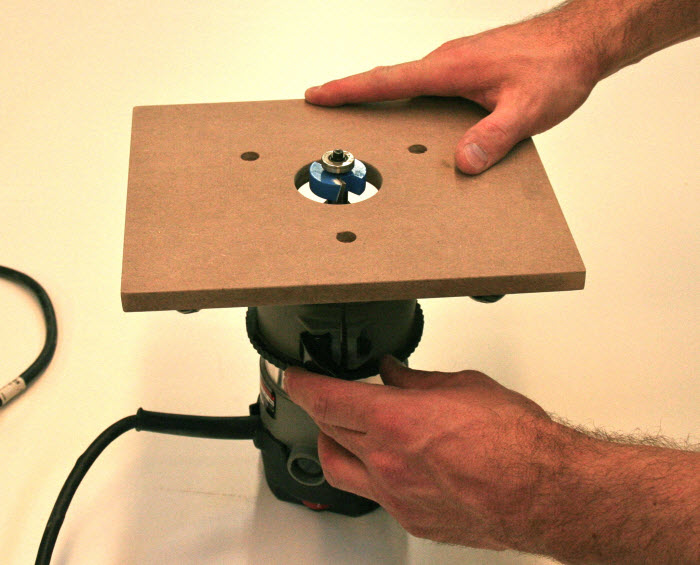
- You need to remove the factory base plate, which is usually ¼ inch thick and made of plastic material. You can use a screwdriver to remove the mounting screws that secure the factory base plate in position.
- Try to figure out the location of the center hole and the holes for mounting in your intended base plate. You can use ½ inch thick MDF if you usually use scrap in your workshop. This thickness is sufficient for sinking the mounting screws. You should also mark the center of the middle hole which will be used for boring out the waste.
- Now that the locations of the holes are clearly marked, use a Forstner bit to drill the center hole. The hole should be at least ¼ inch bigger when compared to the size of the router bit cutter head. This is sufficient for free spinning of the bit. Clamp the base plate into the drill press table so as to prevent it from flying across the room.
- The next step is to drill and countersink the pilot holes where the mounting screws will hold the pilot plate. You can use some insulating foam when drilling so as to avoid marring the bench top. Since the new base is thicker unlike the old one, ensure the screw holes are sufficiently deep and use screws that are long enough.
- Your new bits will now fit the base plate. Sand the surfaces and the edged a little using sandpaper. For better results, wrap the sandpaper around a block. This will eliminate sharp or any kind of protruding spots from the base plate. In theory, this procedure seems complex but in practice, it is pretty easy to follow all these steps and come up with the best router base plate.
For the Router Table Base Plate
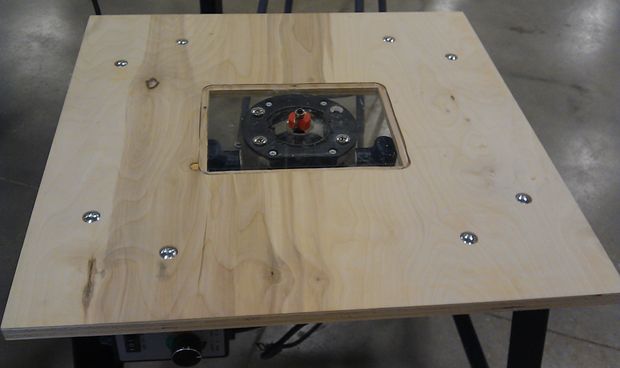
One of the other ways to make a router base plate at home is to prepare your own router table. Follow the same steps as outlined above but this time uses a bigger piece of MDF, then clamp it upside down on the workbench. You can use an 18 inch by 22 inch MDF which is ideal for rounding over small parts. This way it will be safer to handle the router instead of using the tool upside down on your workbench. The bigger table is also more stable.
In case you need a fence, you can simply join two edges of a scrap of about 24 and create a void where the router bit will go through. If you want to use a straight edge then there is no need for the hole. Once done, clamp it where you desire and it will be ready for use.
Preparing the Circle Template
It is also quite easy to prepare a circle template with the application of the same procedure mentioned earlier. Create a base plate that is about 8 inch by 30 inches long then mark and drill the holes on one edge of the jig.
With the router blade turned parallel to the longer side of your jig, and the router jig mounted, measure about 1-1/2 the distance from the router blade edge. Mark that point using a pencil. If for example, you need a 40 inch round table top, measure 20 inches from the bit to the center. You can now drill at the mark for the center of the circle at the bottom of your jig.
Take a screw and drill it through the center hole through the jig to the workpiece. You should drill through the entire piece if you want to make a template. If you are making a finished piece, secure your jig in the center hole at the bottom of the piece. You can use a plunge or a fixed base router to carry out this operation. Switch on the wood router and lower the router bit gently into the work piece.
Push the wood router gently through the piece of wood and the router follows the radius pre-determined. Make a number of passes while ensuring you lower 1/8 inch each time. This will give you the cleanest results and it is the safer.
You can now use your homemade base plate without spending a dime on another router bit. Choose any of the options above and embark on your wood routing projects.
Conclusion
The massive variety of router bits, guides, jigs, and fences that can be bought at specialty woodworking stores make the potential of the router unlimited. You can broaden the scope of your router by preparing your own base plate at home. With the guide above you can avoid using a lot of money every time your router bits do not fit the factory base plate.