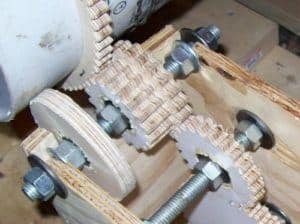
How to Make a Wooden Gear with a Router?
Most people are aware of the versatility of wood routers but the majority of them are intimidated by the prospect of making custom wooden gears for themselves. It is actually very easy to make wooden gears with a router. Below are some simple steps on how to make wooden gears in your workshop.
Points to Note
- It is recommended you use plywood when making your wooden gears.
- You can also use UHMW plastic, phenolic or Masonite.
- Materials such as ordinary spruce and fir plywood are never ideal since they have layers that are normally too coarse. The wood is also not strong enough. Avoid regular boards or ordinary plywood.
Step 1
Begin by making a template for the gear shape. You can refer to free online gear templates or any other reliable source when looking for a gear template. These plans allow you to print the plan straight from the templates. You will get various gear sizes from these templates.
Step 2
Once you have your template, glue the paper template into the plywood of approximately 10mm or 3/8 inch thick. You can glue it by using a thin coat of wood glue along the edge then press the paper template onto the plywood.
Step 3
Use an awl in punching a divot at the center in-between every 2 teeth of the gear.
Step 4
With the use of 5/16 (approximately 8mm) brad point drill, make a hole in all the spaces between the gear teeth. 5/16 is an ideal size for teeth spacing when making gears for the router lift or even the box joint jig.

Key Points:
- The divots made using the awl helps in centering the point of the drill for each hole. You may realize that the drill cuts slightly away and not exactly in line with the template. Do not worry about that, it is ok.
- Ensure the table is tilted to the right when making cuts on the left sides of the teeth and tilted to the left when making cuts on the right sides of the teeth. This is mainly done to ensure the teeth tend to narrow towards the bottom. If the bandsaw table you are using cannot tilt to the left you can improvise by placing a piece of plywood over the end and use a Bandsawspacer to tilt it.
- In case you are making gears that mesh in the same plane, avoid cutting the teeth at an angle, and therefore in this case you do not need to tilt the table.
Step 5
With the spaces in-between the teeth cut out by the holes already drilled, there is no need for you to cut sideways below the teeth, thus you realize it is a bit fast to do the cutting with is method using the router. You will notice that with this method it takes you a very short time to cut one by hand unlike what you see on Youtube videos of homemade CNC machines. CNC machines require two to three passes for materials of this thick.
Once we are done with cutting the sides of the teeth, trim all the teeth to size. Now we no longer need the template since we are done with cutting the teeth and drilling the center hole. You can use a belt sander to remove the template.
Step 6
It is now time for you to mount the new gear on the box joint jig. The one you are working on may work superbly with no need for binding. However, if it is your first gear, you may mount it before sending the template. If you want to find out what is left of the template lines when you were making a few improvements here and there. In case some parts of the gear end up the binding, take a file and use it to tweak the shape of the teeth.
Step 7
Apply 2 to 3 coats of varnish which will help hold the fibers of the teeth together and prevent wear and tear. This will also facilitate an easy movement of the gear on the jig. You may also use wood glue on the edges if you do not want to bother with varnish.
Step 8
Use a screw that has a smooth shank for the handle. You can use a longer wood screw instead of a shorter one since they are much easier to work with. You can use an angle grinder to cut the screw to the ideal length. It might take you a second to cut through the screw and it is always fun to see sparks fly as you do this.
You can hold the screw by screwing it into a piece of wood, and then clamp that piece of wood into the vise. You might think of using a hack saw to cut to cut the screw off, but you will not be able to do so properly since the steel in wood screws is a little too hard for the saw.
Step 9
Once you cut it off, de-burr it and place a slight taper on its end so that you can still manage to get it into the hole. You can drill the screw hole on the smaller side for the screw to fit more tightly. Then screw the handle screw all the way, then for the handle to spin freely back it out by approximately a quarter turn. Ensure also that the screw does not stick out of below the gear.
And there you have your wooden gear. You can make a number of gears with various sizes until you are a pro in doing it. To be more proficient in making wood gears with a router, it is advisable that you buy a woodworker’s handbook or use video illustrations since you get to see images or videos of how it is actually done. A wood router should be a part of every woodworker’s workshop since there is no limit to what you can do with it. Your only limitation will be your imagination and the type of router bit used.

